在个人开发wordpress主题时,在首页插入幻灯片功能是许多人想要使用的.那怎嘛在不适用插件的情况下进行添加呢?以下小编分享下自己的经验
方法一:使用.swf播放器的插件添加
1.在index.html页面的合适位置添加代码
<div class="entry-content"><script src="<?php echo bloginfo('stylesheet_url')?>/flash.js"> </script></div>
让后在flash文件中修改相关的路径,如下图
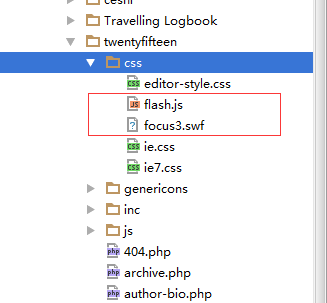
同时,要在主题目录根文件正确的位置添加flash.js和focus3.swf文件如下图:
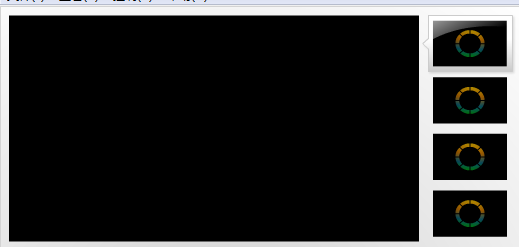
其中focus3.swf的效果如下图:
如此,便可以添加幻灯片了.此方法的缺陷:需要加载swf插件,随着H5的兴起有些落伍.其次,不能添加关联按钮控制轮播图片的切换.
(ps:小编还不会实现下载功能,如果有需要flash.js和focus3.swf的插件联系邮箱:shoudoagxw@163.com)
方法二:后台添加幻灯片类制作轮播特效
此方法相对而言简单些,在后台添加一个分类目录,在该分类目录下写3片文章(或你想要的轮播张数).让后在模板你想调用轮播效果的地方添加循环方法,便可以实现轮播效果.网上有篇教程使用的是if循环,我不知道哪里出错了,没有细看和调试,以下是我使用的方法:
<div class="avia-slideshow avia-slideshow-2 av-control-default av-default-height-applied avia-slideshow-featured_large av_slideshow_full avia-slide-slider ">
<ul class="avia-slideshow-inner" style="padding-bottom: 42%;">
<?php $posts1 = get_posts("category=15&numberposts=2");
$query_index = 0; ?>
<?php if ($posts1) : ?>
<?php foreach ($posts1 as $post) : $query_index++;
setup_postdata($post); ?>
<li class=" slide-1 ">
<a href="<?php echo site_url() ?>/category/products/london-bus/" data-rel="slideshow-2"
class="avia-slide-wrap">
<img style="width: 100%; height: 630px;" src="<?php echo catch_that_image() ?> "
title="<?php the_title() ?>" alt="<?php the_title() ?>" itemprop="thumbnailUrl">
</a>
</li>
<?php endforeach; ?>
<?php endif;
wp_reset_query(); ?>
</ul>
<div class="avia-slideshow-arrows avia-slideshow-controls">
<a href="#prev" class="prev-slide" aria-hidden="true" data-av_icon="" data-av_iconfont="entypo-fontello">Previous</a>
<a href="#next" class="next-slide" aria-hidden="true" data-av_icon=""
data-av_iconfont="entypo-fontello">Next</a>
</div>
<div class="avia-slideshow-dots avia-slideshow-controls">
<a href="#1" class="goto-slide active">1</a>
<a href="#2" class="goto-slide ">2</a>
<a href="#3" class="goto-slide ">3</a>
</div>
</div>
其中调用图片需要在functions中插入一段函数,大家在网上搜调用文章中的缩略图会有一堆答案,小编就不在此啰嗦了.而图片的轮播效果和图片的位置及样式需要用到js和css大家需要自行修改.
方法三:利用置顶文章作轮播特效
首先,需要进入后台添加文章页面,在文章名称下面点击快速编辑,在弹出的对话框中选择置顶文章。需要几个幻灯片就置顶几篇文章。
第二步,在主题的方法中添加以下函数,用于获取文章中的第一张图片。
// 获取内容的第一张图
function catch_that_image() {
global $post, $posts;
$first_img = '';
ob_start();
ob_end_clean();
$output = preg_match_all('/<img.+src=[\'"]([^\'"]+)[\'"].*>/i', $post->post_content, $matches);
//四、获取文章中第一张图片的路径并输出
$first_img = $matches [1] [0];
//五、如果文章无图片,获取自定义图片
if(empty($first_img)){ //Defines a default image
$first_img = "/images/default.jpg";
//请自行设置一张default.jpg图片
}
return $first_img;
}
第三步:在网站首页需要调用幻灯片的位置添加以下HTML代码:
<!--图片轮播区-->
<div id="com_box" class="com_box ftl">

    <?php
$sticky = get_option('sticky_posts');
rsort( $sticky );//对数组逆向排序,即大ID在前
$sticky = array_slice( $sticky, 0, 5);//输出置顶文章数,请修改5,0不要动,如果需要全部置顶文章输出,可以把这句注释掉
query_posts( array( 'post__in' => $sticky, 'caller_get_posts' => 1 ) );
    if (have_posts()) :while (have_posts()) : the_post();
    ?>
    <div class="img dpn"><a href="<?php the_permalink(); ?>" target="_blank" title="<?php the_title(); ?>"><img class="img_directly_load" src="<?php echo get_first_image(); ?>" alt="<?php the_title(); ?>" /></a></div>
    <?php endwhile; endif; ?>

    <ul id="com_txt" class="title">
        <?php
$sticky = get_option('sticky_posts');
rsort( $sticky );//对数组逆向排序,即大ID在前
$sticky = array_slice( $sticky, 0, 5);//输出置顶文章数,请修改5,0不要动,如果需要全部置顶文章输出,可以把这句注释掉
query_posts( array( 'post__in' => $sticky, 'caller_get_posts' => 1 ) );
        if (have_posts()) :while (have_posts()) : the_post();
        ?>
        <li></li>
        <?php endwhile; endif; ?>
    </ul>

</div>
<script type="text/javascript">

    function com_change()
    {
        var self_now = 0;
        var self_speed = 5000;
        var self_auto_change = null;
        var self_max = $('#com_box div.img').size();
        function self_change(i)
        {
            $('#com_box div.img').hide();
            $('#com_txt_bg li').removeClass('on');
            $('#com_txt li').removeClass('on');
            $('#com_box div.img:eq(' + i + ')').show();
            $('#com_txt_bg li:eq(' + i + ')').addClass('on');
            $('#com_txt li:eq(' + i + ')').addClass('on');
        }
        function self_interval()
        {
            return setInterval(function(){
                self_now++;
                if (self_now >= self_max)
                {
                    self_now = 0;
                }
                self_change(self_now);
            }, self_speed);
        }
        $('#com_box div:first').show();
        $('#com_txt_bg li:first').addClass('on');
        $('#com_txt li:first').addClass('on');
        $('#com_txt li').each(function(i)
        {
            $(this).mouseover(function(){
                self_now = i;
                clearInterval(self_auto_change);
                self_change(i);
            }).mouseout(function(){
                self_auto_change = self_interval();
            });
        });
        $(function(){
            $('#com_loding').hide();
            self_auto_change = self_interval();
        });
    }
    com_change();
</script>
第四步:幻灯片需要使用JS文件,所以需要下载jQuery.js文件,并在网页中引入Js文件,<script type="text/javascript" src="<?php bloginfo('template_url'); ?>/images/jquery.js"></script>
接下来需要添加上css样式代码。如下仅供参考:
/*换灯片*/
.com_box {width:627px;height:279px;overflow:hidden;position:relative;}
.com_box img{width:100%;height:100%;}
.com_box ul.title li.on {background:#3598db;}
.com_box ul.title {position:absolute;bottom:10px;right:5px;z-index:9;}
.com_box ul.title li {counter-increment:listxh;display:inline-block;border-radius:12px;background: #000;}
.com_box ul.title li:before{content:counter(listxh);display:inline-block;text-align:center;color:#fff;width:24px;height:24px;line-height:24px;font-weight:600;font-size:11px;font-family: "微软雅黑";}


此方法,小编测试过后,发现有很多的不完善之处,置顶文章没有会把所有的文章图片都调出来做轮播图,还有一些细节问题不完善,所以小编不建议使用。(参考:学做网站论坛)
方法四:利用js插件作轮播特效
第一步:在前端网页中放入以下代码:
/*css样式*/
<style>
@charset”utf-8″;
abbr,address,article,aside,audio,b,blockquote,body,canvas,caption,cite,code,dd,del,details,dfn,div,dl,dt,em,fieldset,figcaption,figure,footer,form,h1,h2,h3,h4,h5,h6,header,hgroup,html,i,iframe,img,ins,kbd,label,legend,li,mark,menu,nav,object,ol,p,pre,q,samp,section,small,span,strong,sub,summary,sup,table,tbody,td,tfoot,th,thead,time,tr,ul,var,video{margin:0;padding:0;border:0;outline:0;font-size:100%;background:0 0;font-weight:400;font-style:inherit;font-family:inherit;vertical-align:top}body{line-height:1;color:#000;background:#fff;font-size:12px;font-family:’simsun’}article,aside,details,figcaption,figure,footer,header,hgroup,hr,menu,nav,section{display:block}nav ul,ol,ul{list-style:none}:focus,a{outline:0}a{margin:0;font-size:100 %;vertical-align:baseline;background:0 0;blr:expression(this.onFocus=this.blur())}a,ins{text-decoration:none}a,hr{padding:0}ins,mark{background-color:#ff9;color:#000}mark{font-style:italic;font-weight:700}blockquote,q{quotes:none}blockquote:after,blockquote:before,q:after,q:before{content:”;content:none}del{text-decoration:line-through}abbr[title],dfn[title]{border-bottom:1px dotted;cursor:help}table{border-collapse:collapse;border-spacing:0}caption,td,th{text-align:left;font-weight:400}hr{height:1px;border:0;border-top:1px solid #cccccc;margin:1em 0}input,select{vertical-align:middle;border:0}
/*————————-归零样式END,请于样式表最前面调用————————-*/
/*—————–自定义按钮样式,移动端不需要,PC端根据实际情况选择—————-*/
.demo {width: 800px;height: 450px;font-size: 14px;position:relative;}
.demo a.control {position:absolute;display: block;top: 50%;margin-top: -78px;width: 76px;height: 112px;cursor: pointer;z-index: 2;background: url(../images/buttons.png) no-repeat}
.demo a.prev {left: 0;background-position: 0 0}
.demo a.next {right: 0;background-position: -76px 0}
.demo a.prev:hover {background-position: 0 -112px}
.demo a.next:hover {background-position: -76px -112px}
/*—————————-为保证最佳效果,建议设置如下样式————————*/
.slider {display: none}
<style>
</style>
<center>
<div class=”demo”>
<a class=”control”></a><a class=”control next “></a><!–自定义按钮,移动端可不写–>
<div class=”slider”><!–主体结构,请用此类名调用插件,此类名可自定义–>
<ul>
<li><a href=””><img src=”images/1.jpg” alt=”两弯似蹙非蹙笼烟眉,一双似喜非喜含情目。” /></a></li>
<li><a href=””><img src=”images/2.jpg” alt=”态生两靥之愁,娇袭一身之病。” /></a></li>
<li><a href=””><img src=”images/3.jpg” alt=”泪光点点,娇喘微微。” /></a></li>
<li><a href=””><img src=”images/4.jpg” alt=”闲静似娇花照水,行动如弱柳扶风。” /></a></li>
<li><a href=””><img src=”images/5.jpg” alt=”心较比干多一窍,病如西子胜三分。” /></a></li>
</ul>
</div>
</div>
<script>
$(“.slider”).YuxiSlider({
width:800, //容器宽度
height:450, //容器高度
control:$(‘.control’), //绑定控制按钮
during:4000, //间隔4秒自动滑动
speed:800, //移动速度0.8秒
mousewheel:true, //是否开启鼠标滚轮控制
direkey:true //是否开启左右箭头方向控制
});
</script>
</center>
第二步:引用jQuery文件
<script src=”js/jquery.min.js”></script>
<script src=”js/YuxiSlider.jQuery.min.js”></script>,YuxiSlider.jQuery.min.js的JS内容如下:
/* @extends jquery v1.10.2
 * @fileOverview 自动兼容PC端、移动端的图片循环滚动插件
 * @email 122452357@qq.com
 * @version v3.0
 * @date 2016-01-05
 * @remark Wang Yunhong -- The love of my life.
 * Copyright (c) 2015-2016 天涯浅唱, 请尊重劳动成果,若直接使用请注明出处,谢谢!
 * @example
 * $("slider").YuxiSlider();
 * @parameter{
           width:容器宽度,
           height:容器高度,
           control:控制按钮,PC端可传入控制按钮对象,移动端无按钮
           auto:是否自动播放 默认自动(true),
           during:间隔时间,
           speed:图片滑动速度,
           mousewheel:是否开启鼠标滑轮 默认否(false),
           direkey:是否绑定方向键 默认否(false)
           }
 */
!function (a) {
    a.fn.extend({
        YuxiSlider: function (b) {
            var c = {
                width: 640,
                height: 360,
                control: null,
                auto: !0,
                during: 3e3,
                speed: 800,
                mousewheel: !1,
                direkey: !1
            }, d = a.extend(c, b);
            return a(this).each(function () {
                var b = a(this), c = a("ul", b), e = a("li", b), f = e.length, g = 0, h = null,
                    i = '<div class="desc"><p class="title"><a href=""></a></p><span class="num"><em class="curr-num"></em><em class="line"></em><em class="total-num"></em></span></div><div class="bg"></div>';
                b.append(i);
                var j = a("p.title a", b), k = a("em.curr-num", b), l = a("em.total-num", b), m = 0, n = {}, o = {},
                    p = {
                        mobileDevice: navigator.userAgent.match(/(iPhone|iPod|Android|ios)/i), init: function () {
                            if (p.style(), p.mobileDevice) {
                                var e = a(window).width(), g = d.width / d.height;
                                d.width = e, d.height = e / g, b.css({fontSize: a(window).width() / 640 * 1.285 + "rem"})
                            }
                            b.add("img", b).width(d.width).height(d.height), c.width(f * d.width), p.description(), p.bindControl(), f > 2 && c.prepend(a("li", c).last()).css({left: -d.width}), d.auto && p.auto()
                        }, auto: function () {
                            h = d.auto ? setInterval(function () {
                                p.moving(!0)
                            }, d.during) : null
                        }, stop: function () {
                            h && clearInterval(h)
                        }, description: function () {
                            k.text(g + 1), l.text(f), j.text(e.eq(g).find("img").attr("alt")).attr("href", e.eq(g).find("a").attr("href")).width(d.width - a("span.num", b).width() - 20)
                        }, bindControl: function () {
                            if (p.mobileDevice) {
                                if (d.control && d.control.remove(), 2 >= f) return;
                                c.get(0).addEventListener("touchstart", p.touchstart, !1), c.get(0).addEventListener("touchmove", p.touchmove, !1), c.get(0).addEventListener("touchend", p.touchend, !1)
                            } else {
                                b.hover(function () {
                                    d.auto && p.stop(), a(document).on("keydown", function (a) {
                                        a.preventDefault(), (39 === a.keyCode || 40 === a.keyCode) && p.moving(!0), (37 === a.keyCode || 38 === a.keyCode) && p.moving(!1)
                                    })
                                }, function () {
                                    a(document).unbind(), d.auto && p.auto()
                                });
                                var e = void 0 !== document.mozHidden ? "DOMMouseScroll" : "mousewheel";
                                d.mousewheel && b.on(e, function (a) {
                                    a.preventDefault(), a.stopPropagation();
                                    var c = a.originalEvent.wheelDelta ? a.originalEvent.wheelDelta : -a.originalEvent.detail,
                                        d = b.data("timeoutId");
                                    d && clearInterval(d), b.data("timeoutId", setTimeout(function () {
                                        p.moving(0 > c ? !0 : !1), b.removeData("timeoutId")
                                    }, 100))
                                }), d.control && d.control.on("click", function () {
                                    p.moving(a(this).index() ? !0 : !1)
                                }).hover(function () {
                                    d.auto && p.stop()
                                }, function () {
                                    d.auto && p.auto()
                                })
                            }
                        }, moving: function (b) {
                            if (1 != f) {
                                var e = 0, h = !0;
                                "boolean" == typeof b ? h = b : (h = b > 0 ? !1 : !0, e = b), g = h ? g >= f - 1 ? 0 : g + 1 : 0 >= g ? f - 1 : g - 1, p.description(), f > 2 ? (h ? c.append(a("li", c).first()).css({left: 0 + e}) : c.prepend(a("li", c).last()).css({left: -2 * d.width + e}), c.stop().animate({left: [-d.width, "easeOutExpo"]}, d.speed)) : h ? c.stop().animate({left: -d.width}, .6 * d.speed, function () {
                                    a(this).append(a("li", this).first()).css({left: 0})
                                }) : c.prepend(a("li", c).last()).css({left: -d.width + e}).stop().animate({left: 0}, .6 * d.speed)
                            }
                        }, touchPos: function (a) {
                            for (var c, d, e, b = a.changedTouches, f = {}, g = 0; g < b.length; g++) c = b[g], d = c.clientX, e = c.clientY;
                            return f.x = d, f.y = e, f
                        }, touchstart: function (a) {
                            p.stop(), m = (new Date).getTime(), n = p.touchPos(a), o.left = c.offset().left
                        }, touchmove: function (a) {
                            a.preventDefault();
                            var b = p.touchPos(a).x - n.x;
                            c.stop().css({left: o.left + b})
                        }, touchend: function (a) {
                            var b = p.touchPos(a).x - n.x, e = (new Date).getTime() - m;
                            0 !== Math.abs(b) && (350 >= e ? p.moving(b) : Math.abs(b) <= d.width / 2 ? c.stop().animate({left: [o.left, "easeOutExpo"]}, d.speed / 2) : p.moving(b), d.auto && p.auto())
                        }, style: function () {
                            b.css({position: "relative", overflow: "hidden"}).fadeIn(450), e.css({
                                display: "inline",
                                "float": "left"
                            }), c.add(a(".bg", b)).add(a(".desc", b)).add(a(".num", b)).css({position: "absolute"}), a(".bg", b).css({
                                background: "#000",
                                filter: "alpha(opacity=50)",
                                opacity: .5
                            }).add(a(".desc", b)).css({
                                width: "100%",
                                height: "3em",
                                bottom: 0,
                                left: 0
                            }), a(".desc").css({zIndex: 2}), a("p.title", b).css({
                                "float": "left",
                                height: "1em",
                                padding: "1em .5em",
                                fontFamily: "microsoft yahei"
                            }), a("p.title a", b).css({
                                display: "block",
                                color: "#fff",
                                textOverflow: "ellipsis",
                                whiteSpace: "nowrap",
                                overflow: "hidden"
                            }), a("span.num", b).css({
                                right: ".5em",
                                color: "#fff",
                                fontStyle: "italic",
                                fontFamily: 'Georgia, "Monotype Corsiva", Arial, sans-serif'
                            }), a("em", b).css({
                                display: "inline-block",
                                position: "relative"
                            }), a("em.curr-num", b).css({
                                fontSize: "2.4em",
                                height: "2em",
                                lineHeight: "2em",
                                color: "#cc191b",
                                bottom: ".625em"
                            }), a("em.total-num", b).css({
                                fontSize: "1.2em",
                                height: "2em",
                                lineHeight: "2em",
                                top: ".6em"
                            }), a("em.line", b).css({
                                width: "16px",
                                height: "3em",
                                background: "url(images/splash_white.png) center no-repeat"
                            })
                        }
                    };
                p.init()
            })
        }
    })
}(jQuery), $.extend($.easing, {
    easeOutExpo: function (a, b, c, d, e) {
        return b == e ? c + d : d * (-Math.pow(2, -10 * b / e) + 1) + c
    }
});

还有幻灯图片,按照路径添加到合适的位置即可实现幻灯片。PS(js是从上往下执行的,所以幻灯的按钮标签一定要放在js代码的前面,否则点击切换图片会失效)
如此这般,也可以实现轮播的效果.不过仍然有弊端,就是如果轮播图有A标签的话,将会跳转到文章页,而这个文章页除了轮播图什么内容都没有会比较尴尬.小编是把A标签写死了.如果谁有更好的方法欢迎指教.
